bacg

Wednesday, September 17, 2014

Coupon Deals!

This week Joann is have a "coupon commotion" and I have plans. :D Well first off with my birthday money. Funny you still get birthday money and look forward to it as an adult because you get to buy things you wouldn't normally splurge on or your budget won't let you. :'( Silly budget.

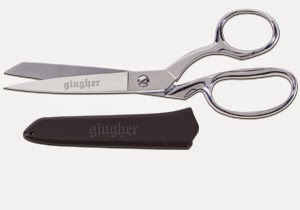
With some money from my mother in-law I got these slick scissors. I absolutely adore them! They cut like a hot knife through butter with all of the fabrics I have used so far. Nothing heavy like denim or wool but I am sure it wouldn't be bothered. Plus, they have a lifetime guarantee; they just have to be sharpened. :D


So very pretty!

Then I have been eying some embroidery scissors because I have tailored a suit jacket and those little corners get tough! I managed it pretty well but it was harder because all I had at the time was some bulks scissors for what I was trying to do. 

With a coupon and my monthly allowance I compared online prices to in store. It was cheaper for me to get them at the store with my coupon compared to online though they are normally cheaper online. There was the choice between the crane and regular embroidery scissors but I am not really a bird person. All the more for those who are! :D 


So cute and curvy like me!

They came with a little leather covering that protects them and since they are Gingher lifetime warranty! :D Oh man. We get so few things that are a life guarantee these days that I treasure them even more. 

2 gingher scissors= 25 bucks spent. :D

That's the regular price of just one of their scissors. I did a happy dance and nearly hugged the cashier but it was AWESOME!

I have been away for a while because I have been busy sewing! :D I tailored four pairs of dress pants and a suit coat. I am currently working on a bathrobe and afterward I have some superhero sweatshirts to whip up before the end of October. 

I have more 50% off coupons that I am going to put towards some lining in a dress I will make after or while also making the sweatshirts. I still have birthday money I am planning to buy some more sewing books and some shoes hopefully. :D

Always compare, watch, and strike when necessary for awesome deals! :D Enjoy your week and I'll post about the dress pants next time. :D

Mrs. Feisty


Friday, August 22, 2014

V8882 Green Skirt & Invisible Zipper Tutorial


I made the same skirt as before. With the pink one I did it with Mastermind and now that we have thousands of miles between us I cannot resume my class with her. To ensure I was paying attention I did this one all by myself.

I always go through the clearance section of fabric and got this green fabric for a killer price. :D Since I didn't have to buy a new pattern but use the old one I saved money that way. It turned out really well and I did get stuck at parts but luckily I have this blog with posts on how to do stuff. The pleats made me pause then I was like, "Oh yeah check the blog!" Then I was on my happy way.

I have also learned that the more you iron the better the product. I hated ironing with a passion when I started sewing because it felt like the most unproductive thing. But now I just put on a podcast or movie and iron away. :D

I am going to add some embroidery along the hem in a ivy leaf pattern. I haven't figured it out completely but I post that as well when it is finished. What I forgot to post about was how to do the invisible zipper.

Invisible Zipper Tutorial

1. Sew 1/2 inch from edge of fabric from top of fabric to bottom markings to where it is supposed to end.

2. Iron edge flat then lay the back flat and separate the edges apart from each other and iron really well.

3. Pin the zipper to where you think you want it situated on the back. Then flip it over and see if the bottom of the zipper is aligned with the bottom of the zipper markings.


4. Once you have it figured out pin it really well and make sure the zipper is aligned to the small gap between the folded fabric edges.


5. Now that it is ready move your needle to the farthest it will go to the side of your zipper foot. It took some messing around the sewing machine for me to figure out how to do it on my machine.


6. Now take a scrap of fabric and run it as practice under the machine to make sure it is doing okay.

7. If the needle is on the far right I want the zipper foot pressed as close as possible to the left side of the zipper and make sure the zipper tab is flipped up or it will cause a bulge farther down the zipper. And sew downward then once you have reached the bottom with the needle in the fabric turn the fabric so that you are going to cross over the zipper. But DO NOT sew over the metal piece of the zipper because that will break your needle. Sew across and back then lift off the needle and cut your threads.

8. Same as 7 but you should have the needle to that farthest on the left pushing the right side of the zipper against it. Also go across at the bottom then snip the threads.

9. It should look like this. Once you are satisfied with your zipper undo the basting of the two edges in the middle.

10. Voila! Any questions or if I missed anything please don't hesitate to comment. The point of this is to guide others and then whenever I want to look back on how to do things.

           -Mrs. Feisty


Monday, August 4, 2014

Skirt Finished!


I wore it to an interview and I didn't have my hair done yet so that's why it isn't fancy. Anyways it is so cute! I picked up some light green fabric from Joann's to make another one with that isn't as transparent.

It is so much fun to wear as well when it's windy because it whips everywhere. The most difficult part of the skirt for me was hand stitching the waist band to the skirt. I was nervous about the pleats in the front but when Mastermind showed me how to do it I wasn't so scared anymore.

I got really stuck up about the zipper because I wanted it to look perfect. you see I did the zipper with mastermind and then I ripped it out because I was confused how some pieces were supposed to get together then I hulked out and ripped out every seam of the skirt we had done.

She saw it in shambles and nearly beat me. I didn't blame her. After ripping out all the seams I ate like 7 smores and some ice cream. Then I nearly cried and read a book. I was confused on some parts were being put together because I cut out the wrong front piece for the pattern.

So I cut out the right piece and sewed it all back together. And tada! :D I will try to get better pictures uploaded. I am entertaining an idea of making my own form to drape my work on so that it doesn't keep getting folded or thrown on stuff. Have any of you done that before? Below is a tutorial if you are interested.

                            Mrs. Feisty

Making your own dress form.
Do's and Don't for a dress form.


Sunday, July 27, 2014

Welcome to the New Sewing Center!


Looks crazy right! Well we FINALLY moved out of my parents place into our own lovely apartment again. At my parents house I could spread my sewing madness across the whole house but here it can't get too far. We have a spare bedroom but we are still moving things around to try and make it our work room.

As you see there is a drying rack. I have found this very helpful to hold strips and folds of fabric while I sew instead of having the pieces folded up and waiting. They don't get very wrinkly when hanging so it lessens my ironing (YES!).  :D

On the table is a clear cutting mat my mother in-law is letting me borrow. It's bigger than my dining room table so I eventually just put it on the floor for the bigger measurements. On the right is my ironing center.

I got the ironing board for 5 bucks at the thrift store! Woohoo! :D A lot of the time when I am doing repetitive work i.e. ironing, hemming, or troubleshooting I will watch TV off my lap top on the wall edge in front of all my stuff.

Since we moved we have a lot to catch up on. I have sewn curtains twice, pillows, a skirt, and working on another skirt at the moment.

Curtains!

Our bedroom has blinds but they only work so well. I had some black out curtains I got from my parents and some maroon fabric to sew together for curtains. Our bedroom colors is beige and maroon.

So I ironed everything, measured, cut, pinned, and sewed the pieces together. And tada!


Oh wait, what is that? That's right, it's a stain. WHAT IN BLAZES! I remembered looking at the fabric while at Joann's and noticed some discoloration but thought it was weird light and she was too fast for me to look while she was cutting then I became distracted.

So I bought stained fabric. I know it wasn't my washer like many reading this are probably thinking. I know my washer and it has not failed me in any way.

Has this happened to any of you before? I hung it in the bathroom to show the stain because it wasn't showing as well against the window. Ignoring the stain you also notice some serious wrinkles.


Wrinkles? Those are things that you are only supposed to be what you get when you start to get old not in your fabric!

Needless to say I did everything but burn the curtains. I was . .  . . . possessed. Yes, that seems most fitting. I noticed the wrinkles and I tried in vain to get rid of them by repeatedly ripping out seams, crying, throwing objects, lots of ironing, tantrum throwing, stabbing my pearl pins into the couch.

You think thats scary? Bwahahahaha. I was so mad I was standing while sewing and saw the wrinkles form while I was sewing and just started proclaiming loudly into the air how much I loved wrinkles and screaming the word 'yes'. My neighbors were probably mortified. But I don't care.

Why not? Because it's my stained wrinkled curtains not theirs so I could do whatever I wanted. People don't believe me when I tell them I turn into a demon when I sew but I do.

I become cranky, high irritable, throw tantrums, and sometimes screaming. Why? Because I want it to be flawless. And that has caused many of you to laugh right now. But sewing and baking are the two things I am a perfectionist about.

Anyways, I remade the curtains. I bought real blackout and new maroon fabric and redid them. There are still a few wrinkles but not to the terrible degree like this. My poor husband hates working from home when I am sewing. He hides as much as he can because I turn into a demon. Who knew? :D

I will post a picture of the new curtains in my next post.


                                                Mrs. Feisty


Sunday, July 13, 2014

Star Wars Bathrobe


I know it shouldn't have taken so long but I learned a great amount of things from doing a simple robe. I also wanted to see what would happen if we stuck to the pattern sizes without personalizing them.

As a result the shoulder's droop off Justin's shoulders which is not flattering if he's trying to strike a pose and it is not long enough for his size. These might be considered nit picky things but its the small things that could make a difference. I also accidentally put the belt loops too low on it. It basically ties around his high thigh. Lol.

I am very grateful to have it finished and he loves it so far. He wore it only for a bit. It is spring here in Western Washington and he got hot very quickly because of the fleece fabric. Which means it will be the perfect adornment during our winter stay in North Dakota this upcoming winter. :D

And it has good and bad guys on it so his allegiance is ambiguous. We are on different sides of the alliance. Duhn. Duhn. Duhn!

-Mrs. Feisty

Friday, June 20, 2014

Do it Twice to Assure its Nice

I cannot tell you how close the seam ripper and I have become. It's like we spend so much time together. Oh wait we do! I'm getting better at reading patterns or I'm reading easier ones to understand. Not sure which one, but either way I am having an easier time.

V-Neck Shirt Update

Still not done. I have ripped out the sleeves multiple times then re-stretching and mashing the fabric back together. Its a knit so it happily resumes it's previous state. I have yet again another ripping session this weekend. But I can't give up! I just can't stand defeat. I'm a sore loser and it's making me blood thirsty. But I can't make my sewing machine bleed because I'm the one pushing the pedal (Operator Error).


Skirt


We are moving on! Vogue is owned by McCalls who knew? I was reading the pattern pieces (kudos points right there) and it says, "Vogue copyright of McCalls Pattern Making". Ann's had a sale on Vogue patterns and I couldn't resist the 4.99 a piece price. Especially because I adore Vogue's styles. Not like I wear evening dresses everywhere (I would have fun doing that though).

I got the skirt pattern and Mastermind offered some fabric that didn't have a purpose yet. It is a delicate apricot color. I wear too much black and wish to wear colors so I am using it as an excuse for a new skirt. Plus, Mastermind wants to teach me to put in a zipper and do a hem.


So far we just have the pieces cut and I did the pleats. They were simple pleats so I was grateful for that. I'm excited to show you how it will turn out. :D


So you just match up the pieces and pin it in the middle of the circle then flip the top fabric piece backward. 


Once you have it flipped backward you mark it with tailors chalk so that you know where to have them match up.


Until next time. Oh and I rediscovered my sewing mojo. :)


-Mrs. Feisty


Heart Blanket


I love this knitted blanket a lot. But it had a hole and I didn't know what to do so time passed and then the hole was big enough for my calf to fit through. I got some remnant fabric from JoAnn's and cut it into a heart big enough to cover the hole. I then applied the same lesson for pleats of making identical marks and then lining them up.

Once I had both sides pinned I started sewing and tried different kinds of stitches and thread colors. I like it a lot. And I am very grateful that I can keep the blanket for longer. :D


-Mrs. Feisty